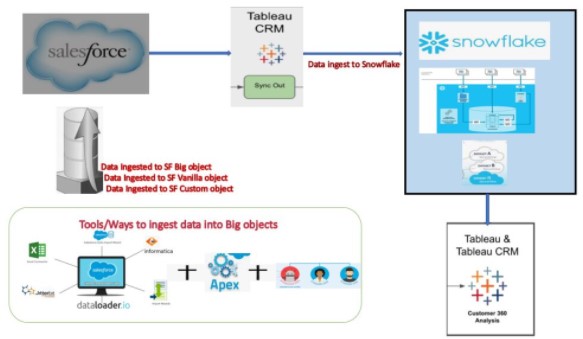
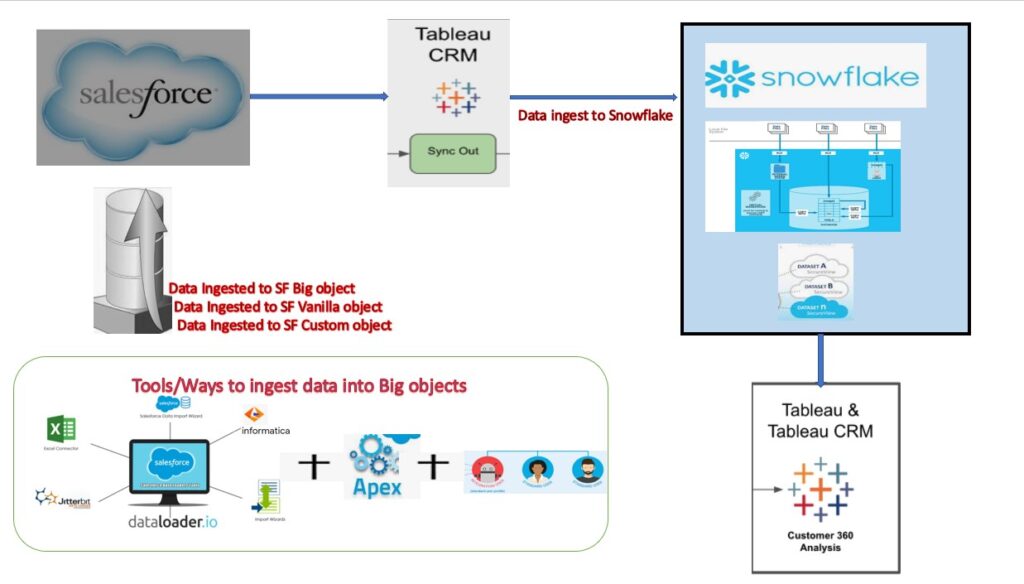
Salesforce – Snowflake Integration: Salesforce has released Tableau CRM Sync Out connector to provide integration among Salesforce with Snowflake. Moreover, Connector moves Salesforce data directly into Snowflake, simplifying the data pipeline and reducing latency. The beauty of connector is it automates Data Definition Language (DDL) creation on the Snowflake side like below:
create or replace temporary stage QOCDpCase file_format =(field_delimiter = ',' skip_header = 0 FIELD_OPTIONALLY_ENCLOSED_BY = '"' NULL_IF = ( '' ) SKIP_BLANK_LINES = TRUE );
create or replace table "CASE"(Id VARCHAR(18), Origin VARCHAR(255), Status VARCHAR(255), LastModifiedDate DATETIME, AccountId VARCHAR(18), ContactId VARCHAR(18), IsClosed BOOLEAN, Subject VARCHAR(255), Type VARCHAR(255), IsEscalated BOOLEAN, OwnerId VARCHAR(18), CreatedDate DATETIME, CaseNumber VARCHAR(30), ClosedDate DATETIME) as select t.$1, t.$2, t.$3, TO_TIMESTAMP(t.$4, 'yyyy-MM-ddTHH:MI:ss.FF3Z'), t.$5, t.$6, t.$7, t.$8, t.$9, t.$10, t.$11, TO_TIMESTAMP(t.$12, 'yyyy-MM-ddTHH:MI:ss.FF3Z'), t.$13, TO_TIMESTAMP(t.$14, 'yyyy-MM-ddTHH:MI:ss.FF3Z') from @QOCDpCase t;
However, Sync Out Connector provides the capability to load the historical data from Salesforce. In addition, also keep the data fresh by capturing incremental loads from many Salesforce objects.
Refresh Modes:
Refresh Modes:
Incremental Sync:Update records to match changes in the Salesforce object since the previous sync. However, only changes incudes, the sync runs faster.
Periodic Full Sync: Sync records incrementally and periodically overwrite all records with records in the Salesforce object. Because of this mode ,prevent the data drift that can occur over time with incremental sync
Full Sync: Overwrite all records with records in the Salesforce object. Because all data is included, the sync can take longer. Use this mode with Salesforce objects that perform hard deletes on records or that contain formula fields
Configure Salesforce and Snowflake:
Configure Salesforce and Snowflake:
Following things to be required to enable the integration between Salesforce and Snowflake.
- Firstly, To start working with Tableau CRMs, you need to sign up for a special Tableau CRM-enabled Developer Edition org. you can’t use an existing Developer Edition org.
- Secondly,To register with new edition , Go to developer.salesforce.com/promotions/orgs/analytics-de.
- After Login, enable Sync Out in Salesforce.
- Create Snowflake objects (Setup a new DB with new roles to capture Salesforce changes).
- Configure the Snowflake output connection in Salesforce.
- Connect to Local Salesforce Data and Configure the Data Sync.
- Finally, Enabling Sync Out and Set a Schedule.
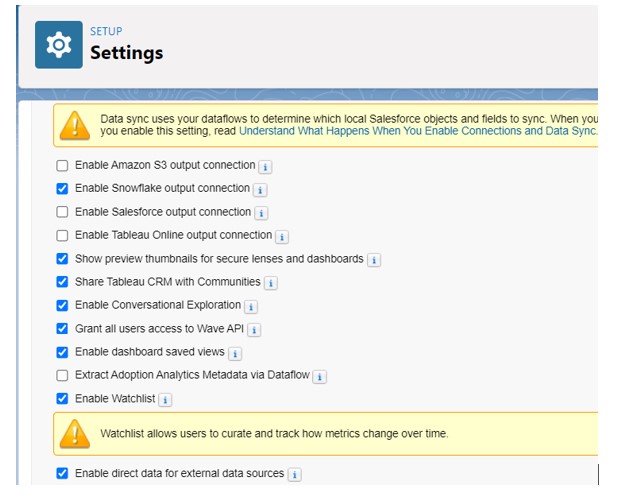
1.Enabling Sync Out in Salesforce:
- Login to salesforce->setup->Analytics->settings
- Check Enable Data Sync, Enable Snowflake output connection, Enable Direct Data for external…
2. Snowflake Login: create Snowflake objects.
CREATE ROLE SF_SALES;

CREATE USER SF_SALES_USR PASSWORD = 'Thakurji@2020' LOGIN_NAME = 'SF_SALES_USR' DISPLAY_NAME = 'SF_SALES_USR' DEFAULT_ROLE = SF_SALES DEFAULT_WAREHOUSE = 'COMPUTE_WH' DEFAULT_NAMESPACE = 'SF_SFDC_DB.PUBLIC' MUST_CHANGE_PASSWORD = TRUE;

GRANT ROLE SF_SALES TO USER SF_SALES_USR;

CREATE DATABASE SF_SFDC_DB;

GRANT USAGE ON DATABASE SF_SFDC_DB TO ROLE SF_SALES;

GRANT all ON schema SF_SFDC_DB.PUBLIC TO ROLE SF_SALES;

GRANT ALL ON WAREHOUSE COMPUTE_WH TO ROLE SF_SALES;

GRANT USAGE, CREATE TABLE, CREATE STAGE ON SCHEMA SF_SFDC_DB.PUBLIC TO ROLE SF_SALES;

GRANT SELECT, INSERT, UPDATE, DELETE, TRUNCATE ON FUTURE TABLES IN SCHEMA SF_SFDC_DB.PUBLIC TO ROLE SF_SALES;
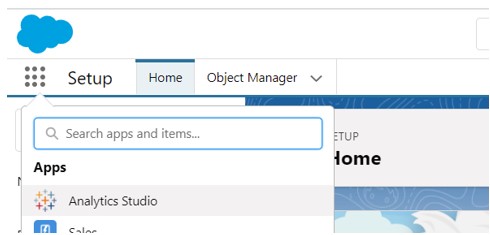
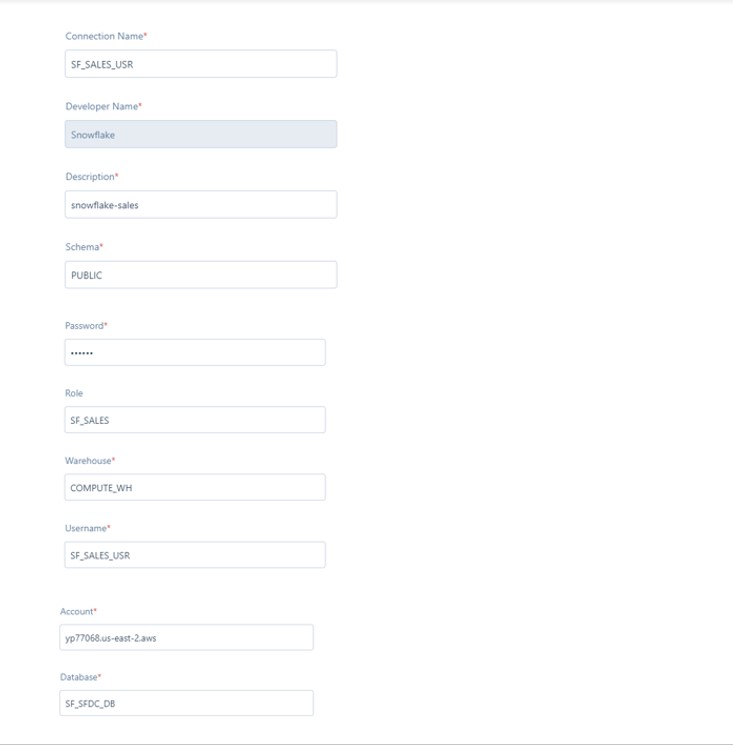
3. Configuring Snowflake output connection in Salesforce:
- Firstly, open Analytics Studio->Data Manager.
- Secondly, In Data Manager, select the Connect tab and click the Connect to Data button on the top right.
- After that,Select Output Connections and click Add Connection
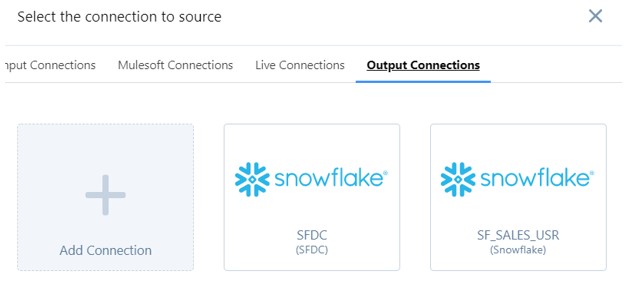
- Select the Snowflake Output Connector.
- Therefore, Enter all required fields like below.
Similarly, To configure, the local salesforce data and Data Manager, Please Click here…..