Network Policy: By default, Snowflake allows users to connect to the service from any computer or device IP address. A security administrator can create a network policy to allow or deny access to a single IP address or a list of addresses. Network policies currently support only Internet Protocol version 4 (i.e. IPv4) addresses.
Network policies allow restricting access to your account based on user IP address. Effectively, network policies enables you to create an IP allowed list, as well as an IP blocked list, if desired.
Properties:
Network Policy Properties:
A network policy consists of the following properties:
Allowed Ips (Required)
A list of IPv4 addresses (with optional subnets) allow access to the Snowflake account.
Blocked IPs
(Optional)
A list of IPv4 addresses that denies to the Snowflake account.
Note that this list is not required because any addresses that are not included in the allowed IP list are automatically blocked.
Important: Snowflake does not allow setting a network policy that blocks your current IP address. An error message results while trying to create a network policy that blocks the current IP address.
Once the Network Policy create ,it is mandatory to Activate in order to reflect the behavior.
To determine whether a network policy is set on an account or for a user, execute the SHOW PARAMETERS command.
show parameters like ‘network_policy’ in account ;
show parameters like ‘network_policy’ in user <<user name>>;
Create an Account-level Network Policy:
Click Account » Security » Policies.
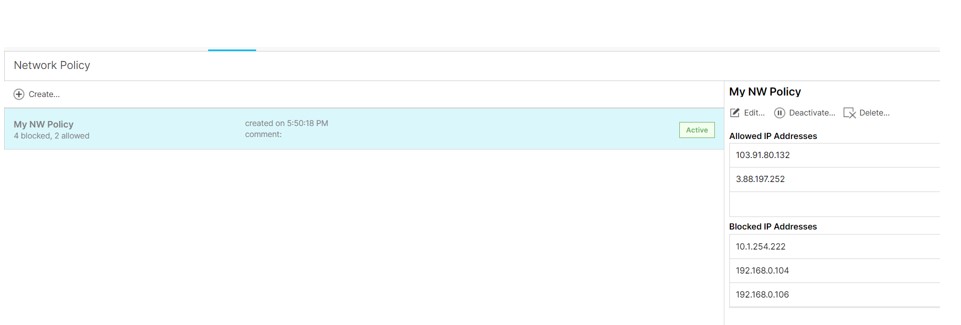
Allowed IP Address:103.91.80.132 is the current IP of my machine and it is required to specify it in the allowed IP Address list else an error message would be returned.
Blocked IP Address: List of the IP address we want to prevent the access of our Snowflake instance. Though it is optional as it will allow only those IP which are mentioned inside the Allowed IP Address list.

Real time scenario
Real time scenario: There was a team working on the MATILLION ETL tool and as part of our project policy we want to restrict the team to access our Snowflake instance until we get the approvals from the management. So we have created the NETWORK policy and assigned only the current IP address which meant it has blocked the access to outside world. Once we got the approvals we have included the MATILLION IP address to our Allowed IP Address list and thus they are able to connect with Snowflake.
Solution:
To replicate the same behavior,
- I have launched below EC2 machine based on the MATILLION AMI Image available in AWS marketplace. Please note this image does not come under Free tier and we have to bear the charges as per usage.
Machine will take some time to up and running.
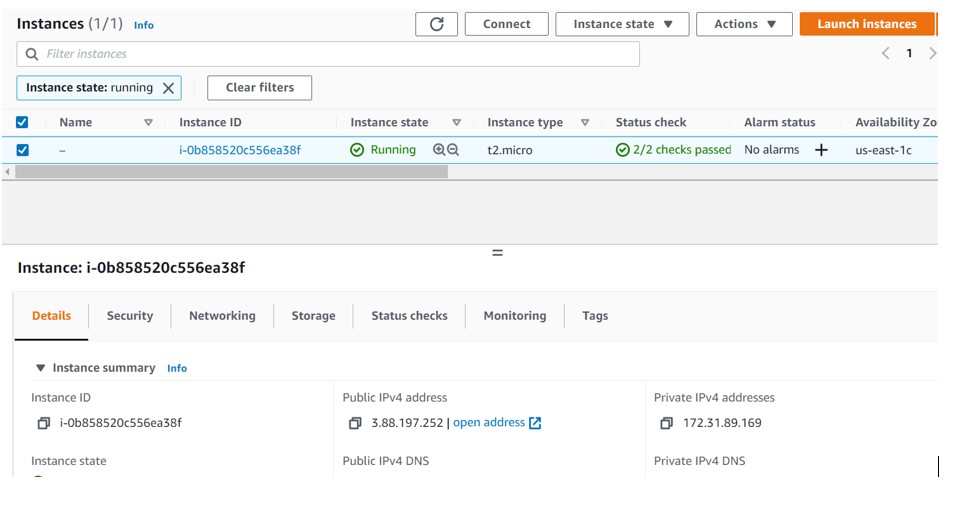
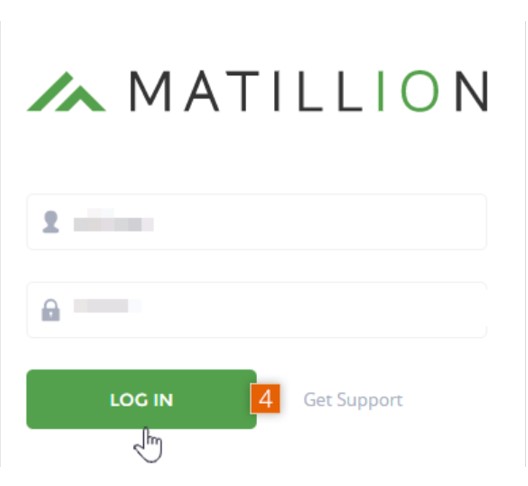
- Click on the open address and it will route you to the new browser , you should see the login page for your Matillion ETL instance.
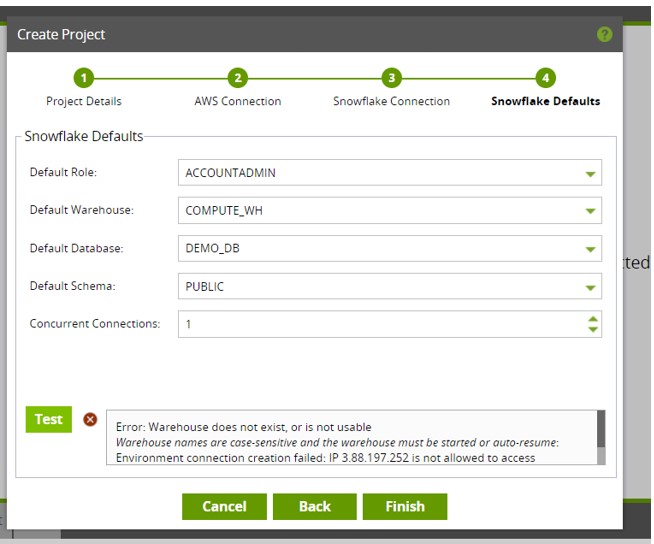
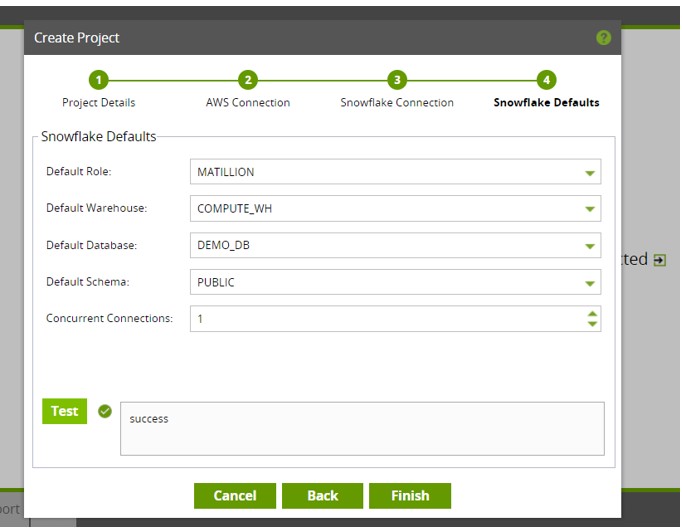
- Click on Create project and complete the details related to the Snowflake and click on Test button.
- You will be unable to connect MATILLIAON with SNOWFLAKE because of the NETWORK POLICY rules.
- Edit the Network Policy and include the Public address in Allowed IP Address list. Please see the below screenshot.
- Now try to connect again and this time connection would be made between MATILLION and SNOWFLAKE.
Note: Please stop or terminate the instance once you complete else would be charge in next billing cycle.
This way we can restrict the access to specified or authenticated IP address.