During last post we discussed how to configure the Snowflake SSO Login with Azure Active Directory We created User ‘Darsh’ in Azure Active directory and assigned the required permission. To enable the SSO login at snowflake side we also created user manually in below way:
CREATE USER "DMITTAL" PASSWORD = 'xxx' LOGIN_NAME ='darsh@sachinmittal2904outlook.onmicrosoft.com'
But assume the scenario where we have number of users available in Azure Active Directory. However, As per the requirement we are supposed to create these Users in side the Snowflake. Also Users should have proper rights so that they can login to the snowflake Database. Moreover, Creating the Users manually in snowflake is not feasible approach as it is more time taking and error prone as well.
To facilitate the Snowflake configuration , instead of creating the user manually we will configure the Provisioning in AAD. Moreover, Provisioning runs at specified time and synch the Azure Directory Users with Snowflake Users.
Technical Steps:
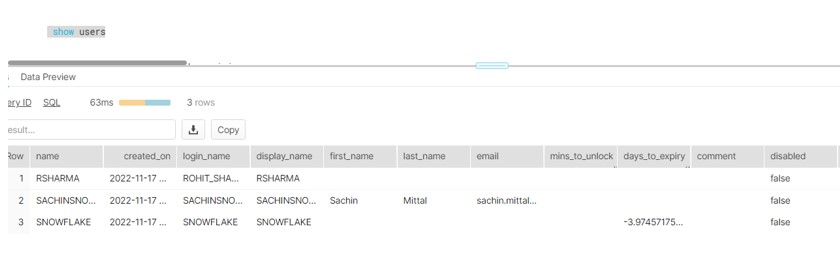
Firstly, Login to the Snowflake with ACCOUNTADMIN Role and verify the existing Users.
Secondly, Execute the below statements:
create or replace role aad_provisioner;
grant create user on account to role aad_provisioner;
grant create role on account to role aad_provisioner;
CREATE OR REPLACE SECURITY INTEGRATION AAD_PROVISIONING
TYPE = scim,
SCIM_CLIENT = ‘Azure’,
run_as_role = ‘AAD_PROVISIONER’;
grant role aad_provisioner to role ACCOUNTADMIN;
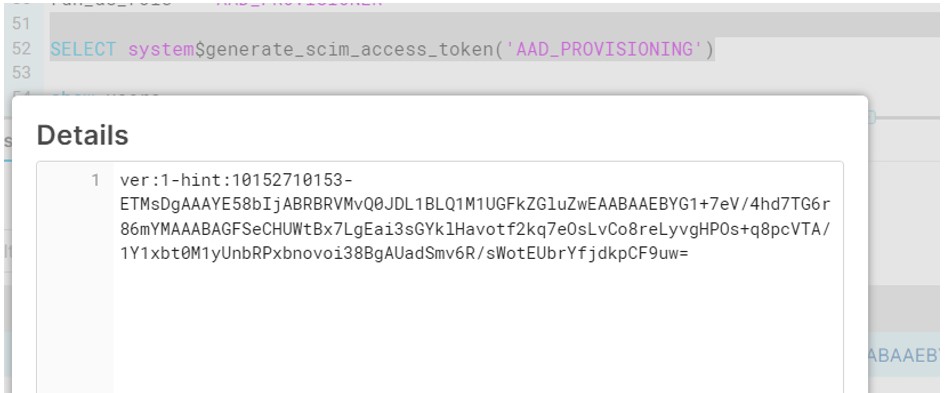
SELECT system$generate_scim_access_token('AAD_PROVISIONING')
Azure:
Azure:
- In Azure Active Directory, enable automatic provision.
- AAD > Snowflake for AAD > Provisioning
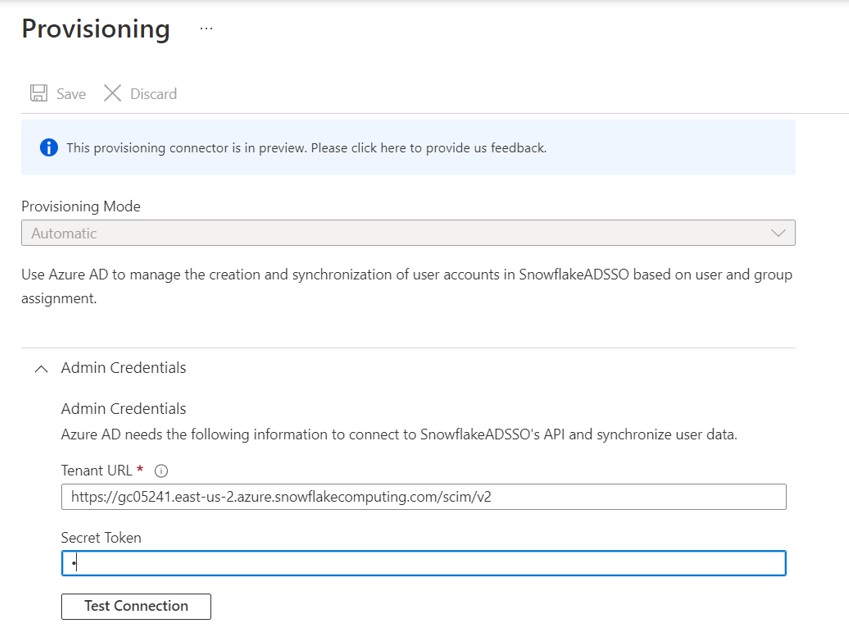
- In Provisioning
- Set Provisioning mode to AUTOMATIC.
- Place the Azure URL value in the admin credentials.
- Paste the security token from above in secret token.
- Test connectivity & save configuration.
- Set Mappings Enabled to YES
- In setting scope, choose “Synch only assigned users and groups“
- Turn Provisioning Status to ON
- Finally, Save & Exit
After the Provisioning executes:
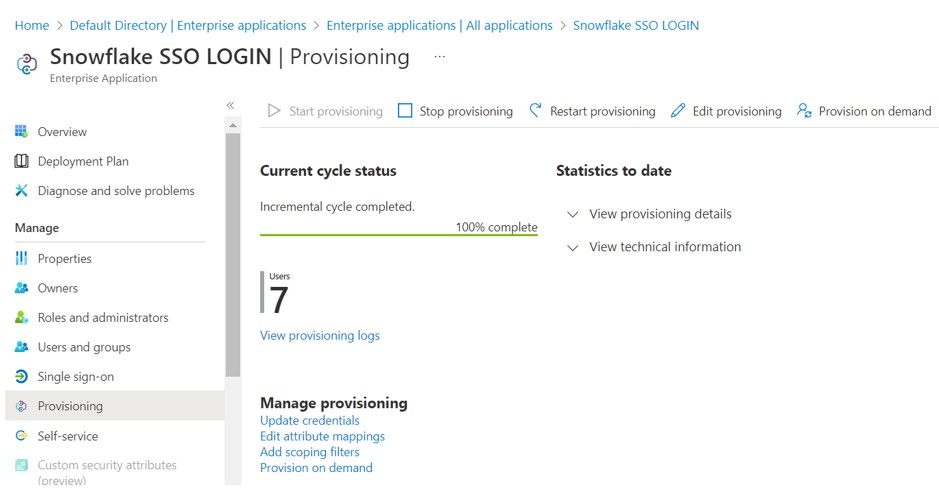
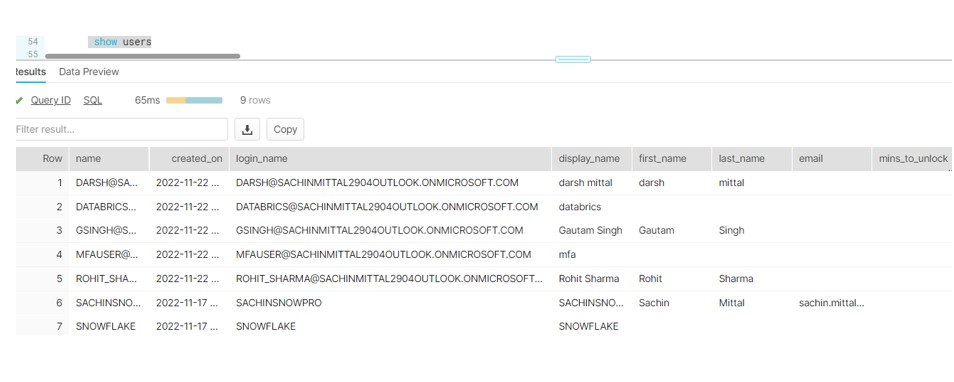
- Run “SHOW USER” in Snowflake & confirm account status
Therefore, All Users got added in snowflake automatically.
Therefore, Login to the new browser and sign in your Microsoft account with new login.
darsh@sachinmittal2904outlook.onmicrosoft.com
Now paste Snowflake URL in another tab and you will see Single Sign On:
https://gc05241.east-us-2.azure.snowflakecomputing.com/


You are awesome Sachin. So much to learn from your post in short time.
Thanks Nitesh for your kind words. Happy to share my knowledge.